
14 New Articles on MakeUseOf | |

- Cool Websites and Tools [April 15th 2013]
- 4 Applications To Dim Your Screen & Keep You Focused [Windows]
- Manage Your Mac Windows Efficiently With Moom
- SugarSync – Seamlessly Sync Your Files Across Multiple Devices [iOS]
- 7 Free Google Services That Cost You Battery Life & Privacy [Android]
- 5 Awesome Things To Listen To On Spotify That Isn’t Music
- What You Need To Know About Removing Android Bloatware
- Take A Break From The Mainstream Music Apps And Try Rocket Player [Android]
- 4 Film Festivals You Can Watch & Enter Online [Stuff to Watch]
- You Just Spilled Water Or Coffee On Your Laptop – Here’s What You Should Do
- What Is The Best Pizza In Town? Dish.fm Will Find It For You [iOS]
- How To Create Your First Workflow System In Alfred 2.0 [Mac]
- 10 Amazing Ways For Teachers & Tutors To Use Twitter In Education
- How Can I Identify The Best GPUs For Bitcoin Mining?
| Cool Websites and Tools [April 15th 2013] Posted: 15 Apr 2013 09:31 PM PDT
These are just half of the websites that we discovered in the last couple of days. If you want us to send you daily round-ups of all cool websites we come across, leave your email here. Or follow us via RSS feed. The post Cool Websites and Tools [April 15th 2013] appeared first on MakeUseOf. | ||||||||||||||||||||||||
| 4 Applications To Dim Your Screen & Keep You Focused [Windows] Posted: 15 Apr 2013 07:31 PM PDT
We all know to shut down our IM clients and get off of the social networks and other online communities, but there’s more you can do for yourself. One tip that I’ve used for months now is to use an application that actually forces me to focus on the task at hand. In this article, I’d like to show you how you can do the same. Dim Your Screen With Clutter CloakClutter Cloak is an application designed for users running Windows XP that will let you dim your screen in multiple different ways so that you can remain focused and get work done. I’m currently running Clutter Cloak on Windows 8 Pro, which comes with a few difficulties. I’d highly recommend using Clutter Cloak only on XP or other versions of Windows without obscuring visual effects (such as Aero). Downloading and installing Clutter Cloak will immediately dock the application’s icon to your system tray. From here, the application is already fully functional.
The default hotkeys, which can be changed in the settings, are as follows:
The Normal hotkey will dim to the focused window. The Photo hotkey will dim to a selection. The Blind hotkey will dim the entire screen. Overall, Clutter Cloak does what it’s supposed to and offers some interesting features. Le DimmerLe Dimmer is definitely my favorite software of this kind (and it’s not because of its Reddit-born name).
Le Dimmer is incredibly easy to use and works on any version of Windows. There is no configuration and no confusion. You launch the application, which is completely portable, and Le Dimmer will dim everything on the screen other than your active window (or object, like your taskbar). There’s really nothing else to it. DropclothDropcloth takes a pretty interesting approach to this problem. Coded by Lifehacker author Adam Pash after seeing the Mac-only Backdrop, Dropcloth acts as just that – a backdrop. Where other applications of this kind take the approach of dynamically dimming your screen, Dropcloth puts you in more control and requires more manual user interaction.
Like every other application here, you can see it achieves the dimming effect quite nicely. One major difference is, by default, Dropcloth docks to both your system tray and taskbar. This means you can manually trigger your backdrop.
You’re also able to change the color at which it dims and the opacity. If you’re constantly dimming windows in different ways and want certain functionality that is difficult to find in other common alternatives, Dropcloth is a very interesting option. GhosterGhoster is a classic, long-time solution to screen dimming and I’ve covered it a bit in a previous article here on MUO. It’s a portable application made by Skrommel over at DonationCoder.com, which is easily one of my favorite places on the web to find gems such as this one.
The above screenshot shows both the dimming in effect and the application’s settings. Ghoster is portable and the settings are stored in an INI file. To modify them, you need to open the file in a text editor and change them manually. You’re able to do things such as change the background color, make the background an image, change the transparency, apply dimming to multiple monitors, and much more. The only issue I’ve ever really had with using Ghoster is that it often leaves the taskbar undimmed when it isn’t focused. Some of you may even see this “bug” as an ideal feature, so that it’s easier to see what windows you have minimized. Either way, Ghoster gets the job done. You’ve got four different ways to dim your screen and achieve the same thing. Now it’s on you to determine which is the most convenient and compatible for your system. Which of these applications is your favorite? Let me know in the comments! The post 4 Applications To Dim Your Screen & Keep You Focused [Windows] appeared first on MakeUseOf. | ||||||||||||||||||||||||
| Manage Your Mac Windows Efficiently With Moom Posted: 15 Apr 2013 07:01 PM PDT
Mac OS X incorporates some great features to work with a multitude of windows and multitask. Just look at the multitasking capabilities of Mission Control. However, actually moving and resizing leaves much to be wanted. Luckily, there are some great applications available to extend Mac OS X and add the features that are lacking. In the past, we already took a look at window management with Afloat. However, Moom does perhaps an even better job. And for all its utility, it costs you just $10. Manage Mac Windows With MoomMoom is a great Mac OS X utility that takes care of everything relating to Mac window management. Where I used to have multiple applications to handle the multiple facets of window management, Moom is an all-in-one utility. It takes care of things such as snapping your computer’s windows to the edge of your screen, and automatically moving and resizing windows to preset sizes. We’ll discuss each of these in more detail below. For now, the important thing to note is that you can enable or disable any of these aspects in Moom’s preferences.
You can run Moom a couple of different ways. Because most of Moom’s business either happens in the background or with popovers, I’d suggest running Moom as a faceless application. This essentially means that Moom won’t take up valuable screen real estate with a dock or menu bar icon. You can configure this in Moom’s settings, at the very bottom of the General pane. The only drawback here is that you’ll have to relaunch Moom while it’s already running if you want to access the settings. Since you’ll only want to configure Moom at the very beginning after you’ve installed the application, this is a minor issue. Snapping To Edges & CornersBy enabling Moom’s ability to snap your computer’s windows to edges and corners, your Mac OS X installation will start behaving similar to Windows 7 (or the desktop view in Windows 8). If you drag a window to the edge or corner of your screen, Moom will snap the window to a predefined part of the screen. Before you release the mouse after dragging a window to the edge of your screen, Moom will show a blue outline of how your window will look like after snapping.
Each side of your screen and the corners in between responds differently to a dragged window. You can configure this behavior in Moom’s preferences, under Mouse -> Snap to Edges and Corners. Zoom ButtonWe previously wrote about how to make the Mac OS X zoom button behave more like on Windows. Moom offers an even better deal. As an alternative to snapping your windows to the edges of your screen, Moom provides more fine-grained move and zoom control by extending the capabilities of the green zoom button at the top of Mac OS X windows.
Hovering over the green zoom button will show a small pop-over. Here, you’ll find a button to snap to the standard parts of your screen, similar to snapping the window by dragging it to the edge of your screen. You can enable the Move & Zoom grid to show below these buttons. The Move & Zoom grid shows you the approximate size and location of the currently selected window and allows you to move and resize it by selecting part of the Move & Zoom grid. Keyboard ControlThe third major interface to manage your computer’s windows uses your keyboard. This is enabled by specifying a hot key in Moom’s keyboard preferences. Pressing the hot key gives you control over the currently selected window with your keyboard, allowing you to move, zoom, grow and shrink the window as wanted.
By default, only Move and Move & Zoom to Half Screen are enabled in Moom’s preferences for keyboard control. More of these controls can be enabled as needed in Moom’s preferences. You can also ask Moom to show a cheat sheet, reminding you with a pop-up of the relevant keyboard shortcuts whenever you hit Moom’s hot key. Custom ControlIn the Custom preferences pane, you can create your own custom controls, by specifying the kind of operation you want to perform on your window and filling in the details. For example, you can move and resize a window to a specific part of the screen, or simply add a size and anchor point to resize it in place.
These custom controls can be triggered by using a predefined shortcut, but can also be added the the Moom’s zoom button controls by enabling this in the Moom’s Mouse preferences pane. Do you keep your computer’s windows on a tight leash? What tools do you personally use to help you with this? Let us know in the comments section below the article! The post Manage Your Mac Windows Efficiently With Moom appeared first on MakeUseOf. | ||||||||||||||||||||||||
| SugarSync – Seamlessly Sync Your Files Across Multiple Devices [iOS] Posted: 15 Apr 2013 06:31 PM PDT
SugarSync does its best to take you outside of the box that most cloud storage services confine your shared files to. By offering potential access to the entirety of your computer’s files via any device, you can do so much more (like creating an automated backup of your files). The iPhone version of the app depends quite a bit on your home station, and while it is true that you potentially have access to the entirety of your computer, you must manually select the folders that you want to be synced. If you haven’t done this before, this can definitely take some time, but fortunately, files are accessible from your iPhone as they are uploaded to SugarSync’s servers. In short, SugarSync itself is a wide and vast service with many features, but the SugarSync iOS app merely complements it. For a more detailed rundown on SugarSync as a whole, you should check out Aaron’s article that explains why he thinks SugarSync is the most well-rounded free file backup and syncing service. The FunctionalityLike I said before, the iPhone app is just a part of SugarSync as a whole. Besides allowing you to access any synced file, you also can access any device that you have connected to SugarSync. Furthermore, you can take these files and do whatever you want with them: email them, copy them, open them in your Google Drive, open them in DropBox, etc. You can even open them in the Bump app for fast sharing with someone else.
In a way, SugarSync for iPhone allows you to have everything that you work on right in your pocket. Granted, there are some limitations with storage plans, and for your information, below are all of SugarSync’s personal pricing plans:
Practically speaking, you likely would not purchase a plan that really allows you to backup your entire computer. But then again, you might, and for those of you who have a computer with low storage (like a MacBook Air), the pricing just might be worth it. Furthermore, SugarSync offers unlimited storage for businesses, but that involves entirely different pricing tiers.
But think about it. The ability to access these files (and even view them) from your iPhone is quite amazing. You can even download certain files to be viewable while offline! The PracticalityI keep reiterating that SugarSync allows access to the entirety of your computer, and this is true. However, you can only access a certain amount of files at a time based on storage limitations. Even still, this a great step up compared to the original features offered by similar services. Typically, you would have access to one folder that was tied to your account, and you would dump all of your desired files into this folder. With SugarSync, you can select multiple existing folders that you would normally use to do this.
Regarding the actual files you sync, there are a number of practical reasons you could have for them. For one, almost everyone has forgotten to email a certain file to a certain someone and put themselves in a situation where they either have no WiFi or have left their PC at home. If you have – for instance – synced your computer’s Documents or Desktop file with SugarSync, you can easily email that file right away from your iPhone. Furthermore, like Dropbox, SugarSync allows you to share certain files with other SugarSync users right from your iPhone – perfect for collaboration. ConclusionSugarSync is a great cloud storage and backup service with great iPhone app. While the service is great as a whole, one must view the iPhone app as just one extension of it. It implements quite a few other factors, so you have to take that into consideration. For those of you who already use SugarSync iOS app, what do you think of it? Should it have made our Best iPhone Apps list? The post SugarSync – Seamlessly Sync Your Files Across Multiple Devices [iOS] appeared first on MakeUseOf. | ||||||||||||||||||||||||
| 7 Free Google Services That Cost You Battery Life & Privacy [Android] Posted: 15 Apr 2013 05:31 PM PDT
These purported “free” services come with a hidden price: First, they cause battery drain. Second, they cause privacy (and sometimes security) concerns – for example, this morning I accidentally barged into a staff meeting while using the bathroom. A simple tap on a Google Hangout link in my phone’s notification bar is all it took. This article details how to stop or minimize battery drain and privacy concerns caused by Google's most intrusive services. However, I must note that Android versions older than Jelly Bean (4.1) will not possess the same software as listed in this article. Additionally, Google makes it impossible to disable all of their services, unless you're willing to root your phone and install a custom ROM. However, that path comes with its own bugbears and pitfalls – do so at your own risk. Why Google's Services Cause Battery DrainWithout your continued participation in its programs, you prevent Google from recording information on your usage habits. If you stop looking at its ads they lose money. Ultimately, your use of Google's services reigns supreme over other concerns, such as horrific battery drain, privacy problems and sluggish device performance.
The Nefarious Google AppsGoogle NowIf you're not familiar with the technology, Google Now is the service that creepily pops up information that you didn’t even know you needed. Part of its stalker-like ability to keep tabs on its users derives from the huge amount of information Google collects from its customers. However, aside from the obvious privacy concerns that Google Now presents us (a single service that aggregates everything a massive corporation collected from its users), Google Now drains a tremendous amount of juice from your phone's battery. To turn off Google Now, activate the service and then press on the Menu button, denoted by three dots. After that, go to Settings and then Google Now.
As someone who uses and loves Google Now, having both a limited data plan and a constantly running background service do not mix. Google CurrentsOne of the proposed successors to the soon-to-be dying Google Reader, Google Currents provides an online magazine-like experience to users on Android 4.1 and later. Unfortunately, it's also one of the biggest battery hogs of all – partly because it constantly refreshes itself in the background, finding new content, and mainly because it keeps your device's data connection running. Poor performance and slowdown were also reported issues. If you’ve never used Currents, it likely won't cause any issues, since you must configure the app before it will run in the background. Also, most reports suggest that Currents did not perform well on tablets using slow (Class 4) flash memory, which indicates a cache issue and I/O bottleneck. If your device doesn’t use inferior flash memory, then it shouldn’t experience such performance problems. To remedy the problems cause by Currents, first, open the app. Second, tap on the Settings icon. Third, uncheck the “Enable Background Sync” checkbox. The problem should go away after restarting your device. Google+This app can activate both your microphone and front facing video camera, which leaves the door open to breaches in privacy. However, it also can run in the background and trigger notifications on your device. In one particularly embarrassing episode of my life, which happened just today, I foolishly logged into a staff meeting while using the bathroom. Please ignore my use of the word “log”, no pun intended. Seriously, no pun intended. Disable Google+ by going to Settings -> Log out. Instant UploadA battery draining feature located inside of Google+. You'll want to turn this feature off, since it uploads your pics to your photo account, if left on. That's particularly bad for your battery if you're connected to the internet through 3G or LTE. Go to Menu -> Settings -> Instant Upload -> turn it off.
Google MapsGoogle Maps liberally uses GPS, for good reason, although it causes tremendous battery drain when you're not using the app. To disable maps perform the following: Settings -> Location Service -> Uncheck Report from this device After which, when you restart, GPS shouldn’t run in concert with Maps. Google LatitudeLatitude perhaps provides the spookiest information on your location. To disable Latitude, go to Maps. Then go to Menu (the three dots), then Settings and finally Location settings where you uncheck Enable location sharing.
Google TalkOne of the most irritating things about Google Talk is that it runs in the background, despite my having no memory of configuring or using it in any way. Friends sometime ask me why I seem to be logged into Talk at all hours of the day – news to me, since up until recently I had never seriously used the application. Apparently, if you have an Android device, Google Talk signs you into chat automatically. This causes both privacy concerns and unneeded battery drain. To sign out, you'll need to start-up the app, click on your account and select Sign out.
Disabling Sync EntirelyIf you want to disable sync for all your Google apps, Google fortunately provides a central location where the majority – but not all – can setup to not sync, without manually activating the app. First, go to Settings. Second, go to Accounts and choose Google. If you have multiple accounts registered with the device, they will both show (and be syncing your data). Tap on the account you want to disable. Doing so will reveal all the services Google syncs you data with. Simply tap on the accounts you want to disable.
Software SuggestionsFor root users, I suggest using a combination of Greenify and Deep Sleep Battery Saver. Ryan also covered a few additional means of reducing battery consumption, Juice Defender being among the best of his options. I’ve written about the Battery Saver app in the past, and how to configure an unrooted phone for better battery management—essentially, it all ties into whether your phone is connected to the internet. Without internet access, Google's services can't go nuts phoning home with your statistics. ConclusionPlease don't do as I did. Barging into a staff meeting riding the porcelain throne will not reflect well upon you at the water cooler, because there won't be a water cooler in your future. However, such actions will give you a great story to tell as you gather around a flaming barrel of garbage beneath the overpass, telling stories of how you arrived at such a god-forsaken place. Image Credits: Toilet via MorgueFile.com; Speak, Hear, See via MorgueFile.com The post 7 Free Google Services That Cost You Battery Life & Privacy [Android] appeared first on MakeUseOf. | ||||||||||||||||||||||||
| 5 Awesome Things To Listen To On Spotify That Isn’t Music Posted: 15 Apr 2013 05:01 PM PDT
A fact that might not be as well known as offline listening is that you can take advantage of that feature with more than just music – with Spotify being home to audiobooks, standup comedy and more. Rather than drown out chatter on your commute with music, why not opt for an audiobook instead? While Spotify itself has yet to delve into the audiobook world, thanks to the public domain, there’s already a significant collection of classic novels, plays, poetry and more. And it doesn’t end there. Spotify also houses a significant collection of standup comedy, with some of the biggest names in the business. And if you’re in the mood for something completely different – you can even listen to NASA recordings of the Apollo Missions and more. Listen To Classic Literature
There is no shortage of classic literature that’s in the public domain on Spotify. A quick search turns up a few of our favorite classics, and then some. There are a few ways you can find them. The first is to simply think of classic books you’re interested in finding, and look them up. You can also use a great online service like the Gutenburg library to think of titles you want to look up. Another great way to discover what’s available on Spotify is to use the related artists feature. When you look up any given book, click on the artist name (in other words – the person who is reading the audiobook) and you’ll find a bunch of related artists who have recorded audiobooks of their own. To get you started, we’ve got a list of some of the most popular classic lit titles that are available on Spotify:
Aside from novels, you’ll also find a few interesting plays that are worth listening to, among them:
There are also some great lists compiled by other people including a list of spooky stories and poems on Spotify, 21 classics and a William Shakespeare list. Listen To Vintage Radio
In addition to classic novels, you’ll also find an interesting collection of vintage radioshows (complete with their original ads) featuring the likes of Errol Flynn and more. One vintage radio playlist has almost 2,000 tracks on it with shows including The Phantom of the Opera, Sherlock Holmes and more. Listen To Comedy
In the mood for something a little less serious? Spotify’s standup comedy collection is impressive and will leave you in stitches. Search for your favourites, check out related artists, or even start a radio station using one stand up comedian for an endless playlist of hilarity. The caliber of standup comedians you’ll find on Spotify is impressive including: Listen To NASA Missions
And in the spirit of Monty Python, and now for something completely different. An absolute hidden gem on Spotify is some NASA recordings, among them, recordings from The Apollo Missions.
The recordings are a fascinating peak into a world we rarely get to see and with Spotify’s offline feature, you can take the NASA recordings with you everywhere you go. Learn a Language
If you’d like to brush up your language skills, Spotify can be a useful companion to lessons you’re taking elsewhere. With the app, Listen Language, you can find recordings that will help you learn English, Spanish, French, Italian, Greek, Swahili, Hebrew, Arabic and much much more. Can you think of other interesting things to listen to on Spotify that aren’t music? Let us know in the comments. The post 5 Awesome Things To Listen To On Spotify That Isn’t Music appeared first on MakeUseOf. | ||||||||||||||||||||||||
| What You Need To Know About Removing Android Bloatware Posted: 15 Apr 2013 04:30 PM PDT
Unlike on a Windows laptop, which also come packed with useless software, it takes a bit of work to actually uninstall these apps on Android. Android 4.0 and newer versions of Android allow you to get rick of bloatware fairly easily, but there’s a catch. Disabling Bloatware on Android 4.0+To disable preinstalled bloatware on a device running Android 4.0 Ice Cream Sandwich or newer, open the Settings screen, tap Apps, and swipe over to the All category.
Scroll down until you find a preinstalled app you want to disable and tap it. If the app has an icon in your app drawer, you can also press and hold on the app’s icon and drag it to the App Info option at the top of your screen to access its details screen.
Tap the Disable button to disable a preinstalled app. You’ll see a warning, so ensure you aren’t disabling anything important. Many built-in Android system apps cannot be disabled, but some important apps can be disabled. Use your best judgment – for example, disabling a NASCAR app is fine, but disabling the Messaging app will prevent you from sending and receiving SMS messages unless you have a third-party SMS app installed on your phone.
You can find disabled apps at the bottom of the All apps list. Tap a disabled app and tap the Enable button to re-enable it.
Disabled Bloatware Still Wastes Storage SpaceThe above process only disables the useless software. It won’t appear in your app drawer and can’t run in the background, so this helps declutter your phone and save battery power. However, the bloatware apps remain installed in the system partition. Apps installed in this special partition are locked in read-only mode so they’ll persist after you factory reset your phone. This ensures useful apps – like Gmail, Google Play, or the Android system apps – remain installed even after a factory reset. However, bloatware abuses this mechanism, wasting your phone’s valuable storage space. Actually Removing BloatwareMost people will be okay with disabling the bloatware and forgetting about the wasted space. But let’s say you actually want to remove this bloatware and free up that space. There are several ways to do this, all of which will technically void your phone’s warranty – so exercise caution.
Disabling Bloatware on Older Versions of AndroidOn an older version of Android, you can’t easily disable the bloatware with the included interface. However, you can root your Android phone and use an app like Titanium Backup (paid) or Gemini App Manager (free) to disable the app in the same way it would be disabled on Android 4.0. This is often referred to as “freezing” an app, as it blocks all access to it. If you don’t want to root and just wish the bloatware wouldn’t clutter your app drawer, you could also try using a third-party launcher. Many of these launchers, such as Nova Launcher, have a built-in feature that allows you to hide app icons from your app drawer. If these apps are still running in the background, they’ll continue to waste some battery power – but at least you’ll reduce the clutter.
Buying Phones Without BloatwareNot all Android devices are saddled with bloatware. Nexus devices sold straight from Google, such as the Nexus 4, come without any bloatware and feature Google’s vision of a pure Android software experience. We wish we didn’t have to recommend a single device or single line of devices here, as diversity and choice is the strength of Android. However, other Android device manufacturers aren’t providing Android phones with clean, uncluttered operating systems. You can get that uncluttered experience by installing a third-party ROM like Cyanogenmod on a phone, but average users shouldn’t be required to do this. For an out-of-the-box Android experience, go Nexus and send a message to Android manufacturers and carriers.
What’s the worst bloatware you’ve ever seen on an Android phone? Leave a comment and share your horror stories or tips for overcoming bloatware! Image Credit: Johan Larsson on Flickr The post What You Need To Know About Removing Android Bloatware appeared first on MakeUseOf. | ||||||||||||||||||||||||
| Take A Break From The Mainstream Music Apps And Try Rocket Player [Android] Posted: 15 Apr 2013 04:00 PM PDT
Recently, I heard about a lesser known Android app called Rocket Player. I checked the Rocket Player Android app out, the screenshots looked enticing, so I downloaded it and gave it a test run. The results were pleasantly surprising, but is it a contender for the title of Best Android Music Player?
Interfaces are the most important aspect of any app, in my opinion. You’d think that in our sophisticated world of the 21st Century, the phrase “don’t judge a book by its cover” would be instilled deeply into our hearts, right? Too bad that’s not the case. The interface is the first impression, and first impressions can often be a make-it-or-break-it deal. Rocket Player’s Android interface is top notch, and by that I don’t mean flashy or innovative. If you’ve read my reviews before, you probably know how much of a stickler I am for clean, minimal, and efficient designs. Well, Rocket Player manages to do all of that while maintaining a polished feel. The app comes with a default of two themes that you can choose from: a Black theme that looks like pretty much every black theme in every app ever made, and a Chrome theme that has a brushed metal appearance reminiscent of older versions of Mac OS. They’re both easy on the eyes. As for the actual layout, it’s about as vanilla as they come. You’ve got artist listings, album listings, song listings – you know, the usual fare. The plus side to Rocket Player, though, is that everything is smooth and fast. My 2-year-old Galaxy S often has trouble with frame skips and lag, but not here. That earns Rocket Player a lot of points from me.
Music players are at their best when they let you listen to music without getting in the way. I’ve fiddled with far too many apps that try to be innovative and slick in their presentation, utilizing drawers and tabs and swipes in order to do this and that. Rocket Player keeps it all slimmed down: you only see what you need to see, everything else is pushed aside. I’ve been using this app for many weeks now and I’m impressed. It may appear to be a boring music player that doesn’t have much panache, but that’s great: The interface is easy to learn so you spend less time looking for the right song and more time listening to it. Up in the corner, you can pull out a Now Playing list of the next songs in queue. Rearranging the queue is fast, deleting songs off of it is even faster, and adding songs requires no more than a long-press on a song in your library.
There are two features in Rocket Player for Android that I haven’t seen elsewhere: free equalizer, and a tag editor. Every music player has an audio equalizer, but Rocket Player is the first one I’ve seen that lets you change it up without requiring the premium version. Of course, the free version is limited in that you can’t save or load presets, but that’s fine by me. The tag editor is a nice touch, too, so you can fix pesky errors without loading up another app or tool. And along the same lines of convenience, Rocket Player lets you take any song in the library and set it as your ringtone instantly. Other features you might enjoy:
For $3.99 USD, you can upgrade to the Premium version of Rocket Player. Access to equalizer presets is not the only thing that comes with it:
My final verdict? I highly recommend Rocket Player for Android users. That doesn’t mean that I think you’ll love it as much as I do; it means that I think it’s worth a try if you still haven’t found the best music player that satisfies your needs. If you’re looking for something clean and sleek with more focus on functionality than graphics, Rocket Player may be for you. The post Take A Break From The Mainstream Music Apps And Try Rocket Player [Android] appeared first on MakeUseOf. | ||||||||||||||||||||||||
| 4 Film Festivals You Can Watch & Enter Online [Stuff to Watch] Posted: 15 Apr 2013 03:31 PM PDT
For many, online film festivals are a cheap and effective way of earning recognition and sharing the fruits of their creativity with an audience. These online-only affairs almost always offer their catalogue of films online, which is a win-win for audiences like you and me. Here are five of the best online film festivals for filmmakers and cinema buffs alike. 48 Go GreenAn ecologically-themed film festival, 48 Go Green is a celebration of films that have a decidedly environmental twist. The clue’s in the name but this particular festival takes its cues from the 48 Hour Film Project in that all presentations must be conceived, shot and finished within a 48-hour period. On the basis of this restriction, the films are relatively short and to the point. 2013′s competition introduces “anytime participation” which means you can start, shoot and upload your film within a 48-hour period of your choice. The festival has embraced the web for its forward-thinking nature, removing boundaries like geographical location and the time involved in physically delivering a film on time. Entry to the competition is $150 per team, though if you register before April 20 you’ll get entry for just $90. I’ve chosen two of last year’s winners, the post-apocalyptic drama Happy Days features two remaining survivors of a world that’s been destroyed by the human race and #Disconnected (above) a twisted tale of a heavily social media reliant society gone mad. 48 Go Green has disabled embedding of these films so I’ve had to link to Happy Days instead. Watch: Happy Days CON-CAN Film FestivalCON-CAN is a film festival started in Japan by IT company Media Research, Inc. with “CON” meaning “soul” and “CAN” representing an appreciative audience. The festival has been held every year since 2005, with each annual award ceremony held in Tokyo each year. Judges are chosen for their movie industry credentials, though there are audience awards for overall popularity too. Each year the films submitted are put online for all to see, though free registration is mandatory in order to view these films. I’ve only been able to find a few of last year’s successes elsewhere online and its those I have embedded below. La Nostalgia del Sr. Alambre, English tranlsation “Mr. Wire’s Nostalgia” is a short animation about a shadow puppeteer from Mexican director and animation artist Jonathan Ostos Yaber. It’s won a bounty of awards from around the world and was a runner-up in the 2012 CON-CAN festival. Also featured below is winner of the audience award for the first pool of films, In My Prison by Italian director Alessandro Grande which received a huge chunk of the total votes. The Disposable Film FestivalMore than just an interesting name, The Disposable Film Festival is an homage to all devices that can take what is perceived as “disposable” film. From smartphones to point and shoots and even basic DSLRs, the point is to take a rather ordinary and no-frills device and put it to good use. The festival puts creativity before budget and equipment, a fact reflected in the measly $5 fee for submitting your film. Did I mention they have real prizes, too? The 2013 competition is over, but you can still submit something next year. The festival will also be making its way around the world, despite being online (and thus accepting online-only submissions) so you might want to check the events page to find out if they’ll be visiting you any time soon. Just like every film festival should, the films submitted are publicly available to all who can reach Vimeo – no private videos, no registration required (take note, organisers). This made it very easy for me to embed two of my favourites, starting with this year’s grand prize winner, Malaria (below). Also featured below is Splitscreen, a runner up in 2012′s competition which uses some clever cinematography to tell a love story. The Shortlist Short Film FestivalShort film is tough, much like writing a short story. Telling your tale in a limited timeframe is an art that many feature-length filmmakers have trouble with, but it’s always a good start for those considering a career in motion pictures. The Shortlist Short Film Festival might just be the sort of festival budding filmmakers should be aiming for, accepting all kinds of submissions from drama to documentary and animation. Interestingly there’s an opportunity for some money to be made by entering your film, as my first choice from last year’s competition is a documentary called The Love Competition, the free trailer for which can be seen below. Stanford university’s MRI labs were used in an experiment which examines neurochemistry and love, and the full film can be seen on Vimeo for a small fee of $1.99. And second of all following the same formula and price point is Fishing Without Nets, a short 17-minute long documentary about piracy off the coast of Somalia told from the point of view of the pirates. The trailer is embedded below, or if you think the film is worth $1.99 you can pay to watch it on Vimeo. Have you ever submitted to a film festival? Enjoyed any of these featured films? Let us know what you think in the comments, below. The post 4 Film Festivals You Can Watch & Enter Online [Stuff to Watch] appeared first on MakeUseOf. | ||||||||||||||||||||||||
| You Just Spilled Water Or Coffee On Your Laptop – Here’s What You Should Do Posted: 15 Apr 2013 02:31 PM PDT
So take another calming breath and answer the following questions. They’ll help you figure out what you need to do next. Can you still see things on your laptop’s monitor? Or are there flames, sparks, and smoke? Remain calm and carry on reading this article. It WILL help you. There Are Flames, Sparks & Smoke!
If you don’t have a C-rated fire extinguisher, you can try using baking soda. Baking soda, when heated releases CO2. That takes the oxygen away from the fire and smothers it. Do NOT use water or liquids. Do your best, but don’t waste time. Get Out. Whether you put the fire out or not, get out of the building. Laptops are made of many chemicals and metals which can be nasty when burning. Don’t try to be a hero. No Flames, Sparks Or Smoke.Good. Remain calm. Chances are this will be the case since many laptops have a degree of water-resistance to their keyboards these days. Still, if you want to save your laptop you’ll need to act fast. The first two steps are the same here as above:
Those steps are the emergency steps. By following those steps, you may have saved your laptop, prevented a fire, and prevented injury to yourself. That’s all that is really important here – your safety. Laptops we can replace, replacing you requires a lot more paperwork and involves a hiring campaign. Now What?Assuming that the fire department didn’t have to come out,and that there is something left of your laptop, we can try to restore the laptop to see if it’s still useable. If not, then we can try salvaging parts from it to recover data, or maybe have some useful RAM for our next laptop, maybe some other things like the screen and electrical components can be saved for kit-bashing into other fun electronics projects. Tina just wrote an excellent article on how to dispose of an old laptop. If you’re looking for greater detail on how to remove components like your hard drive and RAM from your laptop, I recommend Matt Smith’s How To Upgrade Your Laptop In a Flash: Add a New Hard Drive & Increase RAM. The 3 D’sIf you are lucky, it was just a water spill. Or at least some other drink that doesn’t have sugar or sugar substitutes in them. The sugary stuff becomes nasty sticky when it dries, you no doubt know.
If you do decide to remove the hard drive, the RAM, or take the laptop apart, little spots of sugary residue can be cleaned away with a Q-tip that is barely moist with pure rubbing alcohol, chemically known as 99% pure isopropyl alcohol. If it’s not on the shelves at your drugstore, ask the pharmacist. If you can’t find it at your drugstore, you can get it online. The nice thing about rubbing alcohol is that it will clean AND almost instantly evaporate, so you’re not introducing any more moisture in the little nooks and crannies, or metal contacts. Once you’ve removed as much moisture as possible, all you can do is let it dry. Do NOT put the battery back in. Do NOT put the power or any other cords back in. Just let it dry, the longer the better. You can speed up the drying process a bit by either increasing the temperature of the air, increasing the flow of the air, or using dessicants that aid in the absorption of moisture. Increasing the temperature of the air can be done in a few ways. One is to use a blow dryer with the lowest heat setting possible. You are going to want to hold the blow dryer at least a foot away from the laptop while you do this to prevent any melting of the laptop. Personally, I wouldn’t recommend this method. You could also use a ‘drying box’. This is more of a professional level method which uses an enclosure that is fed with warm air. The laptop sits inside the enclosure on a grate so that there is maximum airflow around the laptop. Some people claim to have had success by placing their electronics in an electric oven with the door wide open and on the lowest setting possible. Do NOT do that. That is so dangerous it hurts just to think about it. Increasing the flow of air can be done with the blow dryer as well, without heat. This method will work, but you’re going to be spending a fair amount of time just standing there holding a blow dryer. Another method would be to put your laptop on something like a baking rack and pointing a household fan at the laptop. Now you’re free to let it sit for a good 24 hours. Using dessicants is probably overkill, but they are worth considering if you have them and you’ve removed your hard drive and RAM. This is not a good method for drying out the entire laptop, unless you have a big bin and a big bag of dessicant. There are professional grade silica dessicants, like the little packets you sometimes see in medicine bottles, or you can use the household remedy we call rice.
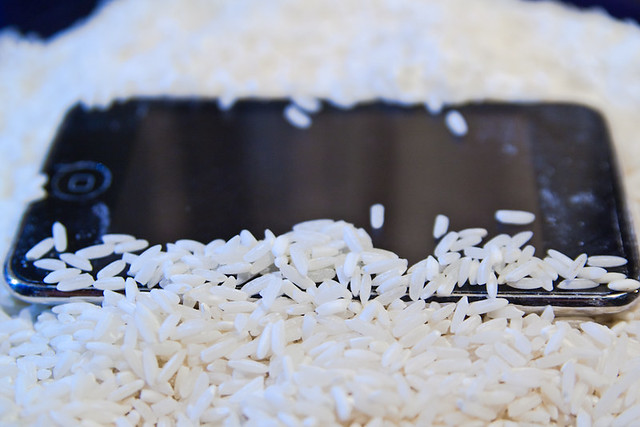
Rice can absorb up to twice its volume in water, making it a handy dessicant to keep around for such emergencies. Rice is also big enough that it is easily removed from the surface of most electronics. You put the hard drive and RAM into a bucket of rice big enough that the rice will completely cover the parts. Let it sit for at least 24 hours, longer if you can stand it. Then remove the parts and inspect for any residual moisture, or globs of sugary drink. Remove those with the dabber, like mentioned above. If you’ve got a bunch of silica packets, you’ll want to empty the contents and immerse your electronics in the beads. The packet material does limit absorption somewhat.
Sugary Drink Glob RemovalIf there is any residue left on the parts or the laptop from a sugary drink, use only the dabber rinsed in warm water and completely wrung out. You may have to gently rub on the residue to remove it, but be careful not to scratch any surfaces if you can – especially your screen. You might notice that some of the keys on the laptop aren’t functioning like they used to – now they stick a little or a lot! Laptop keys are fairly easily removed and replaced. Gently pry up the key until it pops off. Underneath the key, you may see an scissor like mechanism. This is what holds the key on, and pushes it back up into place after your press the key. Gently clean around that part with either your dabber or a slightly moist Q-tip until all the residue is gone. Jackson did an article on doing this same thing on his MacBook.
You can use either plain warm water, or rubbing alcohol as mentioned above. Personally, I don’t recommend soapy water. Do the same with the key itself. Once you’ve removed all the residue, gently push the key into place. If done well, you’ll hear a satisfying little click and feel the key go down and come right back up again. Now move on to the next sticky key and do the same thing. Once you’ve gone through your keyboard one by one, give the laptop some time to air out and try the keys again. It’s Dry – Now What?Now, you can either take it into an authorized repair depot for a through inspection and testing, or you can fire up the laptop and see what happens. Although the first idea is the best one, I can guess that most of you won’t do this. Sure it costs money, but so does a new laptop and lost data. Okay, now you’re laptop is powered up and you’ve turned it on. Either it works – or it doesn’t. If it works, good for you! Go buy yourself a no-spill sippy cup as a reward! If it doesn’t work, all is not lost. Now comes the data recovery part. Data RecoveryMaybe the laptop’s motherboard is cooked, or the RAM is no good. Really, that’s for a technician to decide. What you can do is try to recover your files off of the hard drive. Here’s how we go about doing that.
What About Next Time?There will be no next-time. You got a no-spill sippy cup right? But just in case, make sure that you are making regular backups of important data to an external hard drive or cloud storage like DropBox or GDrive. That way, you can at least avoid the panic of whether your important data is safe or not. You may also consider looking into hardware insurance for your laptop. Some plans cover replacement due to perils like spillage or even dropping. These plans are usually purchased from someone other than the manufacturer, and you need to read the plan very carefully before buying into it. We’ve covered the emergency measures to make sure that you are safe in the event of a spill on your laptop. We’ve also gone over the cleaning and drying of your laptop to try to save it and keep it useful. We’ve also gone over some steps on data recover if your laptop simply didn’t make it. We’ve also touched on preventative measures so that this incident doesn’t repeat itself. I hope you’ve found the information here useful, or at least it opened your eyes to what can possibly happen with spills around electronics. If you’ve found it useful, or have some stories about spills to share, please do so in the comments below. I respond to as many comments as I can. Image Credits: Laptop Keys via Jackson Chung, MakeUseOf.coms, Clean Motherboard with Q-Tip via Shutterstock, Silica Gel packets via Shutterstock, Coffee Spill on Laptop via Shutterstock, Drying iPhone in Rice via stevendepolo Flickr The post You Just Spilled Water Or Coffee On Your Laptop – Here’s What You Should Do appeared first on MakeUseOf. | ||||||||||||||||||||||||
| What Is The Best Pizza In Town? Dish.fm Will Find It For You [iOS] Posted: 15 Apr 2013 01:00 PM PDT
There are plenty of services that can help you find a good restaurant. Yelp, Urbanspoon, Trip Advisor and Foursquare are just a few, and if you know what you’re looking for, chances are you’re going to find it. But have you ever had a craving for a specific dish? Say, banana pudding? Or fried rice? Have you ever visited a city and wondered where you can get the absolute best burger or the best pizza in town? The big apps are less helpful in these cases, as they don’t really go by dish, but rather by restaurant or cuisine. A new take on food hunting called Dish.fm aims to change this, by aggregating reviews and photos from other networks, and arranging them so you can find the best dish around, rather than the best restaurant. The free iOS app currently works only in a limited number of US cities, but aims to expand to the rest of the world in the future. Getting StartedThere are several ways to get started with Dish.fm. For best experience, you should grant the app access to your current location. This is the first action you’ll have to perform upon launching the app, and it will make finding the best dish around much easier. Since I’m not in the US, I didn’t grant the app this permission, and was still able to browse the dishes and restaurants without a problem. Access to location data is not a must, but it will nag you about it every time launch the app. You can log in to the app using Facebook or Twitter, but you can also use it effectively without doing so. If you don’t want to log in, tap “skip” in the top right.
If the app can detect your current location, and it happens to be in one of the 15 US cities currently supported, Dish.fm will present the tastiest dishes around you, complete with pictures it pulls from Instagram. Since not every dish has a photo, some will appear without one, but each dish comes with a like count, an address, distance in miles from your current location, and, of course, the name of the restaurant where it’s served.
You can use the slider on the right to adjust the suggested dishes’ distance from your current location. This can be anything from 0.1 of a mile to 15 miles, and at present you can’t switch to kilometers. On top, you’ll find several ways to fine-tune your suggestions. To start, decide if you want to look for dishes or restaurants (yes, Dish.fm does restaurants too). I recommend going for dishes, but Dish.fm’s restaurant search is also nice as it aggregates reviews from several sources, helping you find something that’s highly rated. If you go by restaurant you’ll also see a star rating, the establishment genre or food type, and an idea about price.
Finding Yummy DishesAnd now for the really fun part of Dish.fm — the dishes! You can always look for the absolute best dishes in your area, but if you’re craving something more specific, you can filter out recommendations for a certain type of dish. Dish.fm shows the most popular searches, but you can also look for specific dishes sorted by types of cuisine and even search for specific drinks.
If you can’t find the dish you’re looking for, or want to look for dishes in a genre that doesn’t appear on the list, just start typing a keyword in the search box. The app will help you find what you’re looking for using suggestions from available dishes.
Each dish on the list is presented with a picture from Instagram, if available, a total number of likes, and other information such as distance. If you see a dish you’re interested in, find out more about it by tapping it. On the dish’s screen, you can see how many likes and dislikes it received, its price, and comments, if any. On the left, you’ll find further details about the restaurant serving the dish such as star rating, address, phone number and hours. You can even see how many reviews the restaurant’s star rating is based on, but remember that Dish.fm relies on reviews from several different sources. From here you can also rate the dish as “Awesome” or “Awful” after you’ve tried it for yourself.
Drag the dish window up to see other dishes available in this restaurant, along with their own ratings. This is a great way to find out more about a restaurant you’re interested in. After all, you may want to eat real food before diving into that banana pudding you were craving.
Of course, nothing is complete these days unless it’s social: tap the share button to share your find on Facebook or Twitter, via email or via Messages. You can also save it to Instapaper, or print it, if you wish. If you choose to log into the app, it will save all your Awesome and Awful ratings for you, so you can quickly find every dish you’ve rated. Unfortunately, I couldn’t find a way to save a dish without rating it, so if you find several dishes you want to try, you’re going to have to remember them, or rate them before trying them – a Favorites section would have been useful.
Finding Where Dishes Are ServedDish.fm doesn’t only help you find recommended dishes to try and the restaurants that serve them, it can also help you get there, or see where places are located relative to where you are now. Tapping a restaurant’s address will show its location on a map, though there are no walking directions or anything like that.
By tapping the globe icon on the top right corner of the app’s home screen, you can also get a map view of all the recommended places in your area. Set the radius to anything between 0.1 and 15 miles, and see the list of recommended places on a map. You can use several filters at once to find specific meals, or let Dish.fm just show the best overall dishes in the area if you can’t decide what you want to have.
Bottom LineAs a foodie, I love the idea behind searching for dishes instead of restaurants. When travelling, I often want to know about the best pizza in town, or the absolute best place to have ice cream. With Dish.fm, the task becomes much easier, and with ratings being aggregated from several sources, I feel that the data I’m getting is pretty accurate. I do wish the app expanded its range to work outside the US, and definitely want to see it on other platforms such as Android. I’m told we can expect both these features later this year, though for the time being Dish.fm is off to a really good start. I’d recommend it in a heartbeat to anyone who likes finding the best places to eat. Download: Dish.fm at the App Store Looking for other food-oriented apps that’ll help you find the best pizza in town? This cool infographic shows the top 35 restaurant-hunting apps, and what each is best for. Check it out! How do you find places to eat when abroad? Do you use apps to find restaurants, or are there better ways? Tell us in the comments. The post What Is The Best Pizza In Town? Dish.fm Will Find It For You [iOS] appeared first on MakeUseOf. | ||||||||||||||||||||||||
| How To Create Your First Workflow System In Alfred 2.0 [Mac] Posted: 15 Apr 2013 12:01 PM PDT
We have covered the basics of Alfred in this article, but the recent release of Alfred 2.0 now includes automation workflows that can help you perform various types of actions on your Mac using a few keywords or hotkeys. Alfred doesn’t require that you know a single line of code, but it does require a little setup time that you will eventually gain back, and more, using its powerful shortcuts. Alfred is a free download, but its Powerpack features cost £15. Alfred Workflow SystemsAlfred is mostly used for quickly launching applications and files, and doing web searches, but with its new Workflows feature, you can set up micros to perform multiple actions at a time. It works similarly to Apple’s Automator.
After you download and add the Powerpack features to Alfred, it contains a few sample workflow systems to get you started. For example, say you want to research reviews on a particular movie. With this sample workflow, all you have to do is launch Alfred’s trigger window, type the keyword “movie”, followed by the name of the movie you want to search. After you hit the return key, Alfred will download search results for that movie in three different websites: YouTube, IMDb, and Rotten Tomatoes. This one powerful workflow saves you several clicks and repetitive typing. And on top of that, you can create similar workflows for your own favorite sites.
Alfred includes four types of workflow objects – triggers, inputs, actions, and outputs. These actions can launch applications and files, open URLs, run AppleScripts, perform iTunes and System commands, filter files, and much, much, more. Creating a Search WorkflowAn entire short manual could be written about Alfred, but I will show how to set up a simple search workflow similar to the one above. This workflow will perform a search term on both MakeUseOf and Google at the same time. To create this workflow, click on the Workflows button in the toolbar, and then click on the + button at the bottom of the application. Select Templates > Web and URLs > “Open default web search in specified browser.”
The following setup should look like this:
Now double-click on the Keyword trigger, and type in a keyword you want to use to activate the workflow. I used “smuo”. Provide a descriptive title and subtext, and if you like, grab add a MUO icon that will help you quickly identify the workflow. Click Save.
Okay, so far we have an action that will do a Google search of a search term you enter into Alfred’s trigger window. But now let’s add a trigger that will search MUO for that same keyword. Click on the + button on the top-right of the workflow editor, and select Actions > Open URL.
Now you will need to add the search URL for MUO. It explains how to do so in the drop down window, but to save you time, you can simply copy and paste the URL below. Click Save and the action will be added to your workflow. http://www.makeuseof.com/search/?q={query} Notice also that you can select the browser you want the search to open in. It doesn’t have to be your default browser. Next, click on the Keyword trigger and then click and drag a connection between the keyword trigger and the Open URL trigger.
Now you’re set. Simply toggle open Alfred, type your keyword trigger, followed by the search term. Hit return and Alfred will do its thing at lightning speed.
This workflow system only scratches the services of what Alfred Workflows can do. Though I heavily use the Mac automation program, Keyboard Maestro to perform hundreds of computer tasks, Alfred has a few special actions that Keyboard Maestro can’t do. Plus, it’s just fun to see how you can get an application like Alfred to perform redundant tasks that you normally do manually. Alfred users with coding skills have already produced dozens of other Alfred workflows that you can download. Just do a Google search for “Alfred Workflows,” and explore what’s already out there. Also, of course, try out the sample workflows and actions already installed in the Powerpack. The website for Alfred also contains a community forum in which users share workflows and questions. Let us know what you think of Alfred as a productivity tool. Do you find it easy to use? What type of workflows would you like to create in it? The post How To Create Your First Workflow System In Alfred 2.0 [Mac] appeared first on MakeUseOf. | ||||||||||||||||||||||||
| 10 Amazing Ways For Teachers & Tutors To Use Twitter In Education Posted: 15 Apr 2013 11:01 AM PDT
I remember my own school days. The fear of taking part in discussions taught me the art of strategically positioning myself in class. Shyness, not lack of knowledge was my bugbear. How great would Twitter have been back then? 140 characters would have banished the demon of shyness and freed my brain from my own trap. It is this very nature of free-flowing chatter on Twitter that is being embraced by teachers today. That's not all; educationists are using Twitter in many other creative ways for teaching and learning. Haven’t heard about Twitter? Where have you been? Here's our handy – Complete Guide to Twitter. Let's check out the amazing ways 140 characters are helping to light the lamp. Why Should Teachers And Tutors Use Twitter in Education?Before we get to the actual uses teachers are putting Twitter to use in their classrooms, let's see in brief why Twitter is a good enough study tool.
These six reasons aren't the only benefits of course. As you try out the microblogging platform as an educational tool yourself, other benefits will soon materialize. These benefits and more are better illustrated with the Twitter teaching methods below: Hashtags and Learning
Set up custom 'classroom' hashtags around lessons and topics. Students can follow these specific hashtags and keep a record of what was taught in class. Again, lesson discussions can be started around these hashtags. Hashtags are the most powerful tool of the microblog and it helps to keep everything tied in together pretty much like a thread. Hashtags also make it easy to follow interesting topics related to the curriculum or anything else that might broaden a student's knowledge base. You can use them to pick up gems from the stream that is Twitter. Joel told us about 5 useful twitter hashtags that you really need to know. As shown, hashtags like #TED or #History are oceans of knowledge. Twitter itself is a vast knowledge network. There are resources like Twitter dictionaries to teach a word a day. There are umpteen hashtags like #gbl for game based learning or #engchat for English language learning etc. Here's a Twitter hashtag dictionary you can refer to. Quickfire Recaps and QuizzesTeachers and tutors can set up Twitter as a quizzing engine with periodic quizzes on lesson topics. Creatively used with rewards, Twitter quizzes could help to keep students engaged with their study materials. Encourage students to actively participate through Twitter and reward them for their initiative. Twitter's conciseness makes it ideal for after-class discussions – 140 character discussions aren't long enough to make you space out! Language Learning
You can follow authors, exchange micro-reviews of their work, start a Twitter book club, create 140-character poetry (twihaiku) or even Twitter fiction. Hashtags help to keep everything together. You can also use tweets as research material for a paper. Citing tweets in an academic paper has been standardized according to MLA guidelines. Twitter as a Bulletin BoardNo more tacked notes on the cork board. Twitter is the perfect broadcast platform to let students know about any news in and around class. It could be a reminder of an upcoming test or even better news like a cancelled one. Twitter may seem like a perfect tool to chat around topics, but teachers can use 140 character missives in more direct ways. A special Twitter account can be set up just for capturing all events in and around campus, a course, or a class. Or Set Up a Twitter Wall
Twitter Walls are Twitter visualization tools that are generally used for large scale conferences and events, but they do find practical uses in a classroom also; especially one with a large number of students. Twitter Walls are web apps which allow you to project a Twitter conversation around a hashtag. These can be projected on a screen. Anyone with a smartphone or a laptop can join in and participate in the conversation. Twitter Walls are also great for bringing in a large audience into a conversation. Even shy students (like I was) and back benchers can join in for interactive Q&A sessions. Some recommended Twitter Wall web apps are – Role Play on Twitter
@RealTimeWWII is a 'live tweeting' Twitter account started by Alwyn Collinson, a history graduate. He tweets events as they happened during WWII. This is an interesting project to bring history to life, and as you can see it's difficult to argue with its impact because the account now has nearly 300,000 followers. In five years, he probably would become some sort of an expert on WWII and its historical impact. Bringing historical events or figures to life could be a class project that will not only teach students about research but also give them valuable lessons in critical thinking. The American President, John Quincy Adams is also a subject of an interesting live tweeting project by the Massachusetts Historical Society. Bear in mind that these are different from parody accounts on Twitter Create Class Newspapers with Twitter Streams
When in school, we had our own magazine and newsletters. Well, they are so old-fashioned when you can fashion a digital newspaper in seconds out of Twitter or any other social feed. A few months back I had looked at the The Tweeted Times to curate your favorite streams into a personalized real-time newspaper. He potential to do one around a topic or the entire class syllabi is quite varied. Paper.li is another custom newspaper creation tool you can look into. Seek Mentors with the Help Of TwitterTeachers should prod their students to connect with established professionals in their areas of study or at least follow them on their Twitter accounts. Twitter is a great tool for being part of a professional community – a Twitter tribe, even as an eavesdropper. By being active on Twitter, students can connect to mentors online who can inspire them in their area of specialty. Who knows, these early contacts can later lead to jobs or even internships. Parent Teacher Meet with a Tweet
Parents can connect to teachers and tutors via their Twitter handles and receive real-time progress reports. The Twitter interface cuts short the time parents or teachers put into interacting with each other. Take a Break
All study and no play makes Jack a dull boy. At the end of a grueling classroom session, free up the mind by using Twitter to play trivia games like Outwit Me or Artwiculate. Check out ten Twitter games I covered a while back. A site like Outwit Me has eight games now – each just as challenging as the other. It's a fun way to introduce some puzzle cracking competition in class and keep the students productively engaged. With these ten creative ways to use Twitter, I have barely scratched the surface. Social media outlets like Twitter help you socialize on one level but on another broader level they can really enrich the learning experience. The good news is that educationists are using social media tools to make lessons more interesting. Blogs, wikis, YouTube, Facebook have established themselves in the classroom to a large extent. For the sake of an argument we might say that this change is more in developed countries; but I dare say that as the new generation of teachers take up chairs, it could be just a matter of time for the rest of the world to follow suit. What do you think? Are you a teacher by any chance? Or, a student who uses Twitter or any other social media for more engaged learning? Image Credit: Step Parents-teachers conference via Shutterstock, Dictionary Series via Shutterstock The post 10 Amazing Ways For Teachers & Tutors To Use Twitter In Education appeared first on MakeUseOf. | ||||||||||||||||||||||||
| How Can I Identify The Best GPUs For Bitcoin Mining? Posted: 15 Apr 2013 10:01 AM PDT
However, even if you have read about the disadvantages to the process and have read our Bitcoin guide, you may have still decided to go for it and build yourself one or more Bitcoin mining rigs. The CPU does not matter for any bitcoin mining machines as the GPU(s) will do all of the work. As this page explains, GPUs can do a lot more number-crunching than CPUs can, which leads to faster mining. We also wrote another article which highlights differences between CPUs and GPUs without a focus on bitcoin mining. Therefore, even the cheapest AMD CPU will do just fine, as you will want to save the most amount of money. Choosing the best GPU, however, is a bit more difficult, so you will have to look at a number of different stats about them. Important StatsThere are three different numbers about a GPU which will be of major interest to you, namely MHash/s, MHash/j, and MHash/s/$. Respectively, these are hashes per second, hashes per joule, and hashes per second per dollar spent on the GPU. MHash/s
MHash/s describes to you the amount of number-crunching the device can do while bitcoin mining. If the number is higher, than the faster it will go through hashes. The more hashes you can process, the less time it will take before you come across a 50 Bitcoin chunk. With better hardware, your chances do not necessarily increase, but you will be able to go through more hashes in less time. This can often be seen as a pure power statistic, although it does not indicate efficiency. MHash/j
MHash/j describes the amount of hashes the GPU can process with 1 joule of energy. This is a good statistic for the amount of work it can do with a certain amount of electricity, so a higher number indicates that it is more efficient at number-crunching. If you plan to keep your mining operation running for a long time, then you will want to find a GPU with a really high number in this category. Usually, the high upfront cost will be worth all the savings later on. Plus, if you are building many of these rigs, it will help prevent fuses from blowing. MHash/s/$
Last but not least there is MHash/s/$. This is a good indicator of how well the GPU crunches numbers based on the cost of buying it — this does not include costs related to electricity for running the GPU (see MHash/j). A high number in this statistic means that dollar for dollar the GPU is better at crunching numbers. If you choose a GPU that has a high number for both the MHash/j and MHash/s/$ statistics, then you will be running a very cost-effective card for what it is capable of doing. However, do not forget to at least look at the MHash/s statistic, because it can ultimately still be a very weak card. Other Tips
You are never going to find the perfect card that boasts the highest values in all three statistics, but you can mix and match to find the card that seems best for you. If you are a fan of nVidia, then I'm sorry to say that you will need to go with an AMD GPU for your mining rig. nVidia cards do not have MHash/s values even close to as high as AMD cards. You can find these statistics on this page, which gets continually updated as new GPUs come out. If you are still completely unsure about which would be a good card, may I recommend the AMD Radeon HD 5970 or AMD Radeon HD 5850? The 5970 has a very high MHash/s value as well as a decent MHash/j value, and the 5850 is decent at the MHash/j statistic and does fantastic with its MHash/s/$ value. Do you have bitcoin mining rigs, or have you considered building one? Do you have any tips for aspiring miners? Any recommended graphics cards? Let us know in the comments! Image Credits: hegemonx, Ron Dauphin, Mukumbura, Forrestal_PL The post How Can I Identify The Best GPUs For Bitcoin Mining? appeared first on MakeUseOf. | ||||||||||||||||||||||||
 Check out some of the latest MakeUseOf discoveries. Most of the listed websites are FREE or come with a decent free account option. If you want to have similar cool website round-ups delivered to your daily email, subscribe


 If you work from a home computer, you probably know just how difficult it can be to stay on task and maintain your focus. The Internet is the busiest place on the planet. Every second, something is happening. It’s tough to pull yourself away from all of that and stay focused. I’ve personally experienced this same problem, and still today I struggle with finding the perfect solution.


 A nameless writer once remarked, "If you're not paying for the product, you are the product." While probably in reference to broadcast television, the saying also applies to Google's recent introduction of several poorly implemented services in newer versions of Android. Over the past year, you may have noticed programs running on your device that you never signed up for or installed.


 I’m the kind of guy who’s always on the lookout for the best. Not to say that I’m picky, because I’m not, but I like to know all about my available options. And when it comes to Android music players, there are a few big names that everyone likes to throw around – e.g.,


 Okay, let’s take a deep breath and deal with the emergency first. Any emergency requires us to take a moment or two and assess the situation. That way we aren’t just reacting, we are acting with intent. Usually, that works out better in the long run. Time is precious in emergencies, but so is rational thinking and that’s what you came here for, isn’t it?


 One of the best parts of every trip, at least for me, is the food. In fact, eating out is fun no matter where you are, but it usually happens most often when travelling. There’s something to be said for picking a restaurant completely at random, not knowing what you’re going to get. You can find real gems this way, but can also find yourself paying for food you really don’t like, or sitting in places you’d rather not be.


 Twitter like all other social media is a virtual Aladdin's cave. It is a gateway to riches. But just like in the story, this Aladdin's cave is also booby-trapped. Use it right and you will come away with the genie of knowledge ready to do your bidding. Use it wrong and you will be a casualty of wasted time. So, 'rub' it just right. Long back, we had taken a look at


 Quite recently, I wrote an article


| You are subscribed to email updates from MakeUseOf To stop receiving these emails, you may unsubscribe now. | Email delivery powered by Google |
| Google Inc., 20 West Kinzie, Chicago IL USA 60610 | |


No comments:
Post a Comment